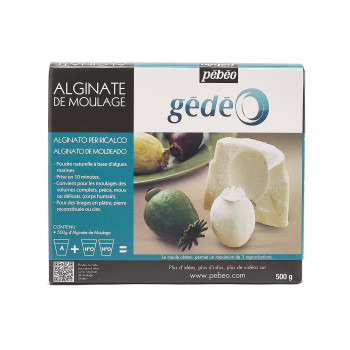
Gedeo Moulding Alginate, 500g
UPC: 3597587663102
EAN: 3597587663102
Added: Dec. 2023
Categories • Auxillaries • Miscellaneous
A natural seaweed-based powder. It is suitable for moulding complete items, soft or delicate objects or the human body. Adult beginners and enthusiasts.
Moulding alginate is a pasty liquid that allows you to create your own moulds when it hardens. It can then be used to mould complete shapes in plaster.
Alginate is of natural origin, as it is made from seaweed.
Place the object to be moulded at the bottom of a plastic cup-like container, holding it in place with a small piece of modelling clay. Take care that the object does not touch the sides of the container. Place a dose of alginate in a bowl, equivalent to half the capacity of the mould. Add twice the volume of water to the alginate powder and mix vigorously for about a minute. The appearance of lumps will not affect the quality of your mould. Then pour the mixture over the object to be moulded.
Leave the mixture to stand for 5 to 10 minutes: it should remain soft but sufficiently set, like jelly. Insert a knife between the glass and the mould to let some air in. Remove the alginate mould from its container and remove the modelling paste from the bottom. Slice the alginate mould lengthways with a cutter, taking care not to damage the object.Cut a hole in the bottom of the plastic container with a cutter. Place the two halves of the mould back together in the container. Turn the container over, with the pierced bottom facing you. Prepare the plaster and pour it into the mould through the opening previously sealed with the modelling clay. Leave the plaster to dry for half an hour, then remove the alginate mould from its container. Separate the two halves and remove the plaster mould. If necessary, sand lightly with sandpaper.
By repeating this process, the mould can be reused for up to three mouldings.
Instructions for use:
- Attach the subject to be molded to the bottom of the glass with a small piece of modeling clay. Make sure the subject does not touch the sides. In a container, pour one volume of alginate, which is half of the form. Pour two volumes of water onto the powder and mix actively for one minute. The formation of any lumps will not hinder the making of your mold. Pour the preparation on the object.
- Wait 5 to 10 minutes for the preparation to set: it remains flexible but must be frozen like a jelly. Slide a knife between the wall of the glass and the mold to create a draft. Take the alginate mold out of its box and remove the piece of modeling clay from the bottom. Cut the alginate mold lengthwise with a cutter, being careful not to damage the subject.
- Pierce the bottom of the plastic glass with the cutter. Place the two parts of the mold back together in the box. Turn the glass upside down with the hole in the bottom facing you. Prepare and pour the plaster into the mold through the opening created by the modeling clay. Wait half an hour for the plaster to dry, then remove the alginate mold from its casing again. Separate the two parts and release the plaster print. Sand it lightly with sandpaper if necessary. By repeating the operation, you can reuse the mold for up to 3 prints.
For plaster, reconstituted stone or wax prints.
Tips:
- Before using the alginate powder, transfer it to an airtight container and shake it strongly. This aerated powder will avoid lumps.
- In order to bring up the bubbles, tap the container on a table for 30 seconds.
- The use of a shaker is possible.
- The setting is accelerated by hot water, and slowed down by cold water.
- It is possible to make a mold by stamping. Slightly reduce the proportion of water, and apply the preparation to the subject when it begins to thicken.
- To make a custom mold, cut a strip of semi-rigid plastic film to the desired height and form a cylinder. Secure it with tape. Place this cylinder on a smooth surface and seal the joint with modeling clay.

